


HP 92, 93, 94, 95, 96, 97, 98, 99 Ink Cartridge Errors
NOTE: “Empty”, “Low Ink”, “Out of Ink“, “? Marks“, “Counterfeit” and “Non-Genuine Cartridge” alerts are COMPLETELY NORMAL for all HP 92, 93, 94, 95, 96, 97, 98, 99 ink cartridges which have been refilled!
While at first this may be an unusual workflow, it does allow print operations to proceed.
Cartridge Errors:
If you observe “Cartridge Not Intended For Use In This Printer”, “Incompatible Cartridge”, “Cartridge in Left/Right Slot Not Intended For Use In This Printer” message, or similar error which prevents printing, this is either an electrical connection problem (between cartridge and printer) or the cartridge has suffered an internal micro-electronic failure. Refer to test diagnostics for your specific printer model to troubleshoot further:
HP 92-99 Ink Cartridge Refills– Solving Error Messages & Warnings:
3 Types of Alert Messages:
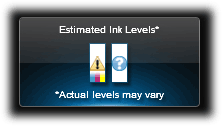
– Information Alerts. When a refilled ink cartridge is installed it is normal to receive alerts such as ‘non-genuine cartridge’ or ‘used color/black cartridge’. These may be bypassed by selecting ‘Dismiss’, ‘Ok’, or ‘Continue’.

– Nuisance Messages. After a refilled ink cartridge is detected it is normal to receive alerts such as ‘low on ink’, ‘counterfeit’, ‘used’, ‘fraud’, ‘refilled’, or ‘depleted’ cartridge. These my be bypassed by selecting ‘Dismiss’, ‘Ok’, or ‘Continue’.

– Severe Errors. When an ink cartridge has poor connectivity (between contacts and flex cable inside printer) or is suffering from marginal internal micro-electrical performance, you may observe error messages such as ‘Cartridge not intended for use in this printer’, ‘Incorrect cartridge installed’, ‘Remove & check cartridge’, ‘Check print cartridge’, ‘Incompatible cartridges’, ‘Print cartridges error’, ‘Cartridge missing or not detected’, ‘Refer to documentation’, ‘Cartridge in left/right slot is missing’, etc. In addition, the power light or exclamation light (Officejet models) may be blinking while the error message is displayed. In some cases, errors can be cleared by removing and thoroughly cleaning the ink cartridges and printer flex cable contacts. If not, then it is suggested to run the cartridge health diagnostics (‘Tap 41’) check or perform a cartridge error bypass (available on select printer models) to confirm that the ink cartridge is damaged.

– Cartridge Electrical Failures. Severe cartridge errors are primarily caused by an electrical breakdown at the cartridge’s nozzle plate. Ink penetration or corrosion into the nozzle plate will cause a failure of the tiny micro-electronics resulting in a variety of different error messages being displayed.

– Cartridge Diagnostics. The cartridge’s electrical health can be verified by running the ‘Tap 41’ diagnostics at the printer’s control panel (NOTE: not available on all printer models).
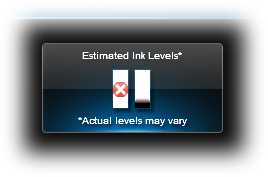
HP Nuisance Alert Messages
Following the installation of a refilled ink cartridge, nuisance or annoyance messages will typically be displayed after the initial ‘low ink’ or ‘non-genuine’ ink messages.
HP 92-99 Ink Refilling & Cartridge Care Tips – Everything you need to know:
Common Error Messages
- Blinking cartridge lights on the printer.
- A message that says “Cartridge not intended for use in this printer”, “Incorrect Cartridge Installed”, “Remove & Check Cartridge”, “Check Print Cartridge”, “Cartridge Missing or Not Detected”, “Incompatible Print Cartridge”, “Black/Color Cartridge Problem”, “Refer to printer documentation”, “Cartridge in Left/Right slot is not intended for use in this printer”, or similar, on your monitor or on the printer display.
Recommended Solutions
The contact between the ink cartridge and the printer must be clean for proper functioning. If any dirt, ink or paper dust is on the contacts, the printer may indicate that the ink cartridge is bad. To ensure a clean contact, follow the steps below:
Step 1: Remove and re-install the cartridge.
Step 2: Clean the contacts on the printer and the ink cartridge using a water dampened lint-free towel.
Step 3: Run a self-test and/or re-set the printer. Refer to Printer Model page (if available) or HP Printer Diagnostics page – click button below.
Advanced Diagnostics
To view advanced diagnostics tests for your HP printer, click here:
Poor Print Quality or Missing Colors:
If any streaks or missing colors appear on prints, thoroughly clean the cartridge’s electrical contacts and printer’s flex driver cable surface. If the cartridge is clogged then a warm water flush may be necessary to recover all colors. Click here for instructions.

NOTE 1: Replacing the ink cartridge is the best way to verify cartridge/printer performance.
NOTE 2: All integrated ink cartridges being repeatedly refilled eventually do fail. Some cartridges/printers may encounter an unavoidable mechanical or electrical failure which is unrelated to refilling. Check for physical damage on the cartridge. Look at the print cartridge and see if there are any cracks, tears or missing elements. Any one of these can cause a failure. In these cases, you will need to purchase a new cartridge and start the refill process again after it has run out.
NOTE: If you need to purchase a new ink cartridge(s) due to a cartridge failure or because a refill center is not conveniently located near you and you would like to cut ink costs, we suggest you try a remanufactured ink cartridge from http://www.inkplicity.com/ Their ink cartridges typically have the lowest cost in the USA, have a high reliability rating, come with a 1-year warranty and provide free shipping for all orders above $20 (purchases available to USA residents only).


