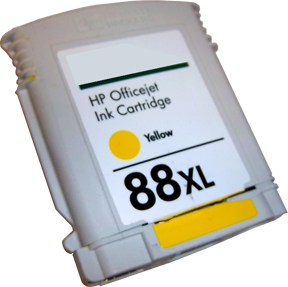
HP 88, HP 88XL Ink Cartridges
Usage Tips 
If any streaks or missing colors appear on prints the cartridge may be suffering from an air bubble within the internal ink spout. Initiate a “Clean Printhead” procedure, via the printer control panel Setup/Tools menu.

HP 88 & 88XL Ink Cartridge Refilling & Care Tips:
Cautions:
Immediately suspend printing if you notice one or more colors are missing in printed output, or damage to the built-in printhead may result. Initiate ‘Clean Printhead’ to help resolve. If necessary, return respective ink cartridge(s) for an ink fill validation check.

To help identify which color cartridge is empty, print a test page via: 1) your printer control panel or 2) via an Inkjet411 test print:
A faded or missing color indicates empty.

Keep a spare set of ink cartridges, for convenience. As an in-printer cartridge is depleted, remove it for refill. Insert the spare into the printer and save the refill as the next spare.
Cartridge Errors (no printing allowed):
As the electronics in the ink cartridge and the printer communicate with each other, sometimes the printer will incorrectly identify an ink cartridge as unrecognized or non-functional. Following ink refill, if the HP 88 ink cartridge(s) is not initially recognized, or incorrectly recognized as another color, first verify the HP 88 smart chip is present (see photo below for correct positioning). If the smart chip is missing or the ink tank is incorrectly recognized as another color, return the cartridge to your ink refill center for tank validation.

If you encounter any of the following errors, perform the recommended solutions below. If these solutions do not work, we recommend that you visit your printer manufacturer’s website or talk with their technical support organization. If you think the refilled cartridge might be bad, take it back to your refiller and have them re-check the cartridge.
Common Error Messages
- Blinking cartridge lights on the printer
- A message that says “Check black/color cartridge” on your monitor or on the printer display
- A similar message that says “Remove and check the black/color cartridge”
- A printer window or toolbox appears that shows a message that a “Cartridge is not seated properly”
- “Replace xxxx cartridge” message
Recommended Solutions
The contact between the ink cartridge and the printer must be clean for proper functioning. If any dirt, ink or paper dust is on the contacts, the printer may indicate that the ink cartridge is bad. To ensure a clean contact, follow the steps below:
Step 1: Remove and re-install the cartridge(s)
- Turn the printer on; open the cartridge access door.
- Remove the suspect cartridge(s) from the station.
- Re-install the cartridges in their stations at left side of printer.

- Close the printer.
- Turn off the printer for a few seconds and then turn it back on.
- Print a test page following your printer’s instructions.
- If this does not work, please proceed to step 2.
Step 2: Re-set the printer
- If the problem has not been fixed it may be useful to perform a “hard reset”. This can correct an electronic flag setting inside the printer telling it that the print cartridge is problematic. Please refer to your printer’s user manual or the manufacturer’s website for the correct “hard reset” procedure for your printer. Often times it simply involves turning off your printer and unplugging it for at least 30 seconds.
- Print a test page to determine if the problem has been resolved.
- If the problem persists, you may need to purchase a new printhead assembly. Refer to Step 3.
Step 3: If print quality cannot be corrected, then one of the respective print heads might be faulty (one is for Cyan/Magenta, the other is for Yellow/Black colors) and will need to be replaced.
NOTE: it is suggested to refer to manufacturer instructions for your printer model. The steps below are provided for general guidance only.
1. Open the top cover to access the printheads. The carriage should move to extreme left side of unit (if not, press and hold the ‘OK’ button on control panel for 5 seconds).
2. Lift the blue printhead latch to gain access to the 2 printheads.

3. Remove and/or reinstall new printhead assembly. Lower the blue latch handle to securely lock the printhead assemblies into place. Close the top cover.

4. Allow the alignment page to print; this will help confirm if the problem has been fixed.
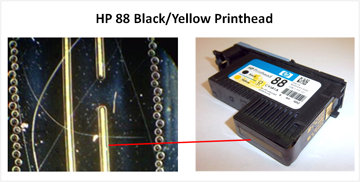
How an Inkjet Printhead Works:
Printhead Life:
The Yellow/Black and Cyan/Magenta PRINTHEAD will eventually fail over time with usage and age.
Advanced Printer Diagnostics:
To view advanced diagnostics tests for your HP Officejet Pro printer, click here:
NOTE: A compatible, remanufactured or re-branded ink cartridge can be problematic; the smart chip (at base of cartridge) may not provide reliable printer-cartridge connectivity once installed. Compatible cartridges are typically purchased on-line or at select retailers (i.e sold under a different label than the regular HP cartridge packaging) and is essentially a “remanufactured tank” of the HP original/genuine ink cartridge. For the best refilling experience, only use HP original/genuine ink tanks.
Refill Center Locations:
HP 88 & 88XL Compatible Printers:
HP OfficeJet Pro K5400, OfficeJet Pro 5400dn, OfficeJet Pro K5400dtn, OfficeJet Pro K5400tn, OfficeJet Pro K550, OfficeJet Pro K550dtn, OfficeJet Pro K550twn, Office Jet Pro K8600, OfficeJet Pro K8600dn, OfficeJet Pro L7480, OfficeJet Pro L7550, OfficeJet Pro L7580, OfficeJet Pro L7590, OfficeJet Pro L7650, OfficeJet Pro L7680, OfficeJet Pro L7780


